Creating an SD card
1. Open PiBakery
If you haven't already, open PiBakery and insert your SD card.
If you've used that SD card with PiBakery previously you might see a message asking if you want to update the SD card. In this case choose No, as we want to create a fresh install, rather than editing a new one.
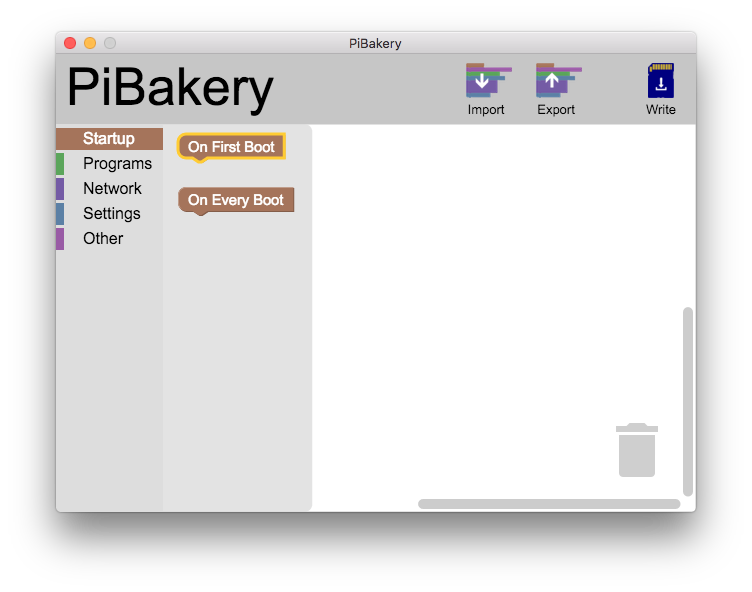
You should now see a window which looks like the image to the rightbelow, which means your ready to start creating your own customised version of Raspbian.
2. Choose your scripts
On the left of the PiBakery window is a column with the different categories of blocks. Clicking on any of these will show a toolbox with all the blocks in that category.
First of all you'll want to tell PiBakery when you want your customisations to happen. Click on the Startup category, and you'll see two blocks; On First Boot and On Every Boot. The On First Boot block is the one that you probably want, as it allows you to customise Raspbian as soon as your Raspberry Pi boots up for the first time. Click and hold on the On First Boot block, drag it onto the main workspace, and release.
Now you need to tell PiBakery what you want to happen on first boot of your Raspberry Pi. This is done by dragging out blocks from the other categories and releasing them underneath the On First Boot block so that they snap together. The blocks will run from top to bottom, so a block that is higher up will run before a block below it.
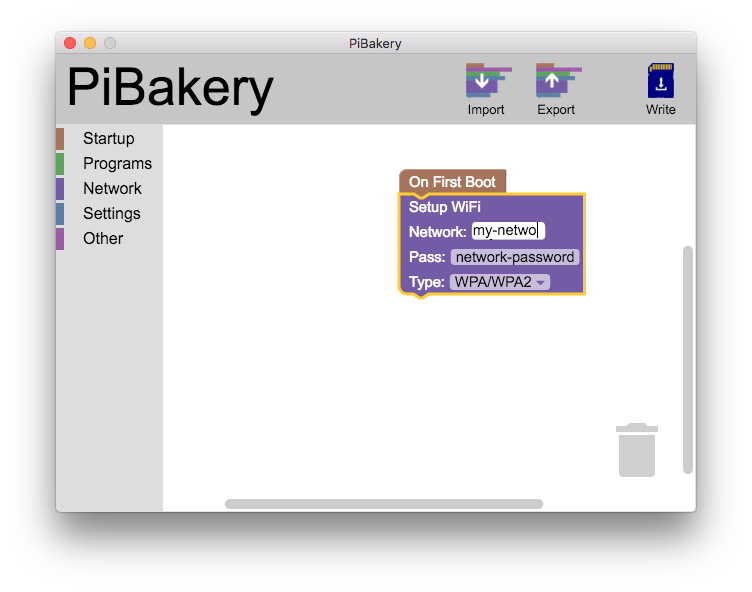
An example of a block that you could drag out is the Setup WiFi block. This block will store a WiFi network's details on your Raspberry Pi so that whenever it is range of that network, it will connect. You can see the Setup WiFi block connected to the On First Boot block in the image to the rightbelow.
Continue adding blocks under the On First Boot block. For example, under the Programs section you could to install a web server with the Install Apache/PHP/MySQL block (internet connection required), or you could use the Set user password to __ block in the Settings section to change the default password on your Raspberry Pi.
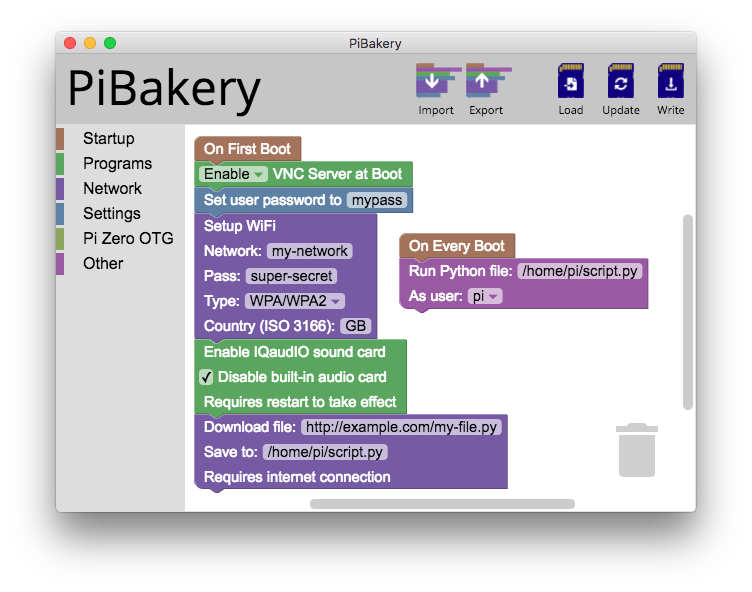
You can also define what your Raspberry Pi does on startup, using the On Every Boot block. Blocks that are placed under this block rull run every single time that your Raspberry Pi is started up. This is useful for auto-starting Python scripts, or other programs that you have made.
An example of a block that you could place under the On Every Boot block is the Run VNC server block. A VNC server is a way of logging into your Pi and controlling it without a keyboard or mouse. This block will see if you have a VNC installed, if not install one, and then run it on your chosen port.
Whilst choosing what blocks to use, be aware that some of them require an internet connection to work. To find out whether a block needs an internet connection, hover over it, and a small description will appear which will tell you if it needs an internet connection.
3. Write to SD card
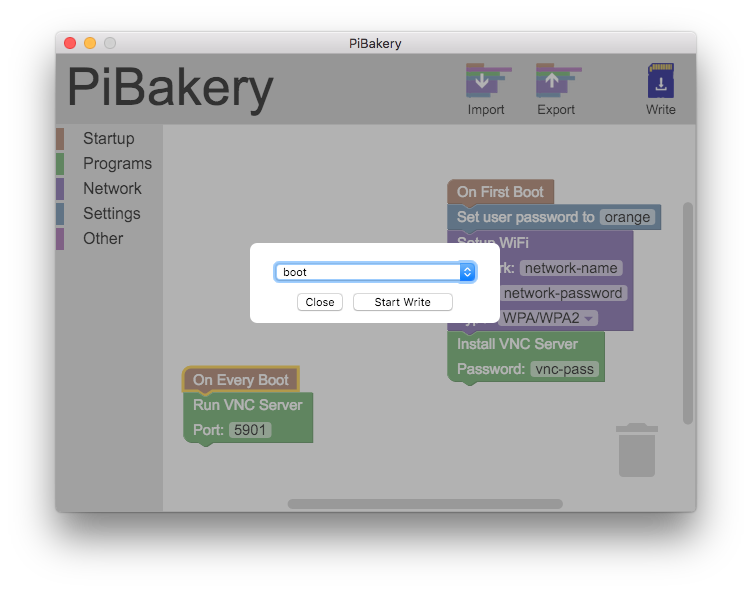
Once you've created the perfect setup for your Raspberry Pi, you're ready to write it to an SD card to use. Insert an SD card into your computer and click on the Write button in the top right corner of PiBakery. This will bring up the SD card chooser, as shown in the image to the rightbelow.
Choose your SD card from the dropdown menu making sure that you choose the right one. The drive that you choose will be erased and then written over, meaning that any data on it currently will be deleted permanently. Once you've chosen your SD card, click on Start Write and choose Yes in the warning dialog that pops up.
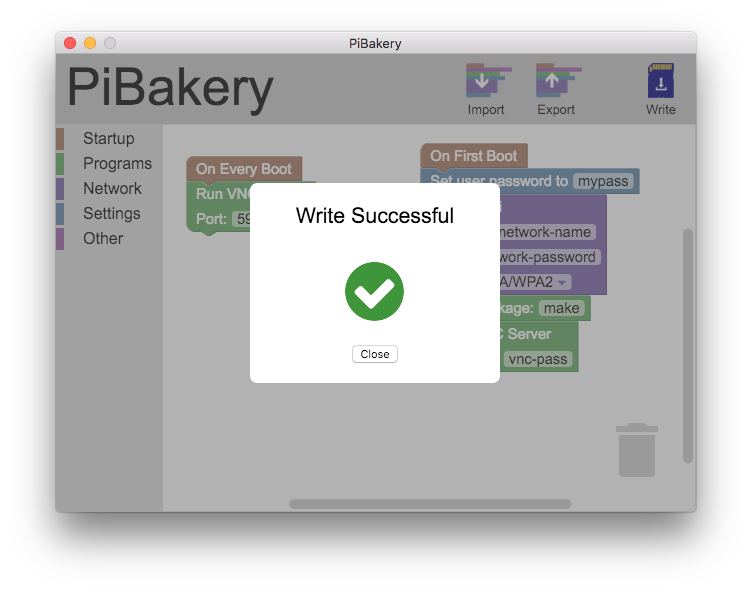
PiBakery will then start to write to the SD card. This will take a few minutes, depending on the speed of your computer and the speed of your SD card. Once the write has finished, you'll see a green tick with the Write Successful message.
4. Boot your Raspberry Pi
Once PiBakery has finished writing to your SD card, you can remove it from your computer, insert it into your Raspberry Pi and power it on. Your scripts will be running after a few seconds, customising Raspbian to your requirements.
Depending on which blocks you specified, the scripts can take a while to run. This is especially true for installing programs, which can take around 5 minutes to complete.
And that's it. Your own customised version of Raspbian.